Harness the Combinatoric Power of Command-Line Tools and Utilities
Create a PDF Resume with Markdown, CSS, and Pandoc
Published April 23, 2024 and last verified on December 13, 2025
Introduction
Keeping a current resume means you’re always ready to apply to a job. One way you can reduce the work to produce a fresh copy of your resume is to switch from Google Docs or Microsoft Office to a text-based approach.
Using Markdown gives you consistency in your formatting, so you don’t have to worry about fonts, sizes, or spacing. Because Markdown is plain-text, you can edit the file in any text editor and track its changes with version control systems. And you can convert Markdown to multiple formats, including PDF and Microsoft Word formats, so you have additional flexibility.
To convert Markdown into a PDF, you can use a variety of free and commercial tools, but Pandoc is a free open source tool that converts documents from one format to another.
In this tutorial you’ll use Markdown, some CSS, and Pandoc to define and create your resume.
What You Need
To complete this tutorial on macOS, you’ll need Homebrew installed, which you can do by following the Install Homebrew tutorial.
Setting Up Your Environment
You’ll need two programs to create your resume. The first is Pandoc, and the second is weasyprint, a library that Pandoc will use to create the PDF.
On macOS, you install these with Homebrew:
brew install pandoc weasyprintOn Ubuntu systems, or Windows systems using WSL, use apt to install Pandoc and weasyprint:
sudo apt install pandoc weasyprintOnce you have both tools installed, you can develop your resume.
Defining the Resume in Markdown
Resumes have the following structure:
- Your name at the top in a larger font.
- Your email, phone number, or other important contact info.
- An optional summary statement.
- An Experience heading, followed by subheadings for your jobs.
- Other headings, like skills, volunteer work, or maybe projects you wish to highlight.
- A place to list your education.
To generate a resume with Markdown, you’ll need to define a structure that can denote these sections. Here’s what you’ll use in this tutorial:
- Use a level 1 heading for your name
- Use a paragraph for the email, phone number, and contact info.
- Use a paragraph for the summary section.
- Use level 2 headings for each major section.
- Use level 3 headings for job titles and years of employment
- Use level 4 headings for company names.
- Use level 5 headings for additional titles within the same company.
- Use bulleted lists for items within each section.
Here’s how the Markdown might look:
# Homer Simpson
(939)-555-3226 | chunkylover63@aol.com

Respected leader in nuclear safety, with experience in security,
volunteer work, and space travel.

## Professional Experience

### Safety Inspector - 1990-Present
#### Springfield Nuclear Power Plant - Springfield, NT

- Spearheaded all intiatives to make Springfield Nuclear a safe
place for employees and the community.
- Expert at operating the T-437 Safety Command Console.
- Responsible for maintenance of status lightbulbs.
- Stopped one nuclear meltdown.
- Served brief term as union president.

### Astronaut - 1994
#### National Aeronautic and Space Administration

- Underwent comprehensive mental and physical training to prepare for
spacecraft launch.
- Flew on one successful mission to space.
- Saved the world from giant ants and ensured crew returned safely
thanks to creative use of an inanimate carbon rod.

### Pin Monkey - 1990-1990
#### Barney's Bowlarama - Springfield, NT

- Polished balls.
- Reset pins.
- Developed unsuccessful marketing plan to drive more business.

### Safety Inspector - 1989-1990
##### Nuclear Technician - 1980-1989
#### Sprinfgield Nuclear Power Plant - Springfield, NT

- Ran various machinery to ensure smooth operation of the power plant.
- Developed initial safety protocals, leading to successful promotion.

## Volunteer work

- Crossing Guard - Springfield Elementary - 2023
- Grand Exalted Leader - Stonecutters - 1994-Present
- Community Watch leader - 1993-Present
- Big Brother - Big Brothers - 1992

## Education

- Completion of Nuclear Physics 101 - Sprinfield University - 1994
- Diploma, Springfield High School - 1974
In this example, each section is explicitly marked up, and the last entry in the Professional Experience section handles the case where the person held multiple consecutive jobs at the same organization by using the smallest heading.
Using this structure, you can now define a stylesheet to make this presentable.
Defining a Stylesheet
To transform the Markdown into a respectable-looking PDF, you’ll have to define some styles. By default, headings will have top and bottom margins, as will paragraphs. Most of the work in the stylesheet will be normalizing spacing and ensuring the various elements have appropriate font sizes.
Create the file resume.css in the same place you created resume.md.
First, define the page margins and base fonts. Add the following code:
@page {
    margin: 10mm; /* Set to 10mm, but you can adjust as needed */
}

html {
  font-size: 10pt; /* Base font size */
}
Next add styles for the body, including the text color, font size, and font family:
body {
  font-family: Helvetica, Arial, sans-serif;
  font-size: 1rem; /* 1rem = 10pt */
  line-height: 1.5;
  color: #24292e;
  background-color: #fff;
  padding: 1.25rem;
}
Add in styles to make the hyperlinks stand out:
a {
  color: #0366d6;
  text-decoration: none;
}

a:hover {
  text-decoration: underline;
}
Style list items and paragraphs so they have appropriate spacing.
ul, ol {
  padding-left: 1em; /* Keeping padding relative to the font size of the list */
}

li {
  margin-top: 0.25em;
}

p, li {
  margin-top: 0;
  line-height: 1.6;
}
Finally, style the individual headings. Leave a space before and after the second level headings, as these denote the various resume sections. Remove the bottom margin from other elements to prevent unwanted blank lines:
/* Name */
h1 {
  color: #333;
  margin: 0;
  margin-bottom: 0.5rem;
  font-size: 2rem;
}

/* Main sections */
h2 {
  color: #333;
  font-size: 1.3rem;
  margin-top: 0;
  margin-bottom: 0.5rem;
  text-decoration: underline;
}

/* Job titles */
h3 {
  color: #333;
  font-size: 1.1rem;
  margin-top: 0;
  margin-bottom: 0;
}

/* Company names, slightly smaller and different color */
h4 {
  color: #555;
  font-size: 1.0rem;
  margin-top: 0;
  margin-bottom: 0.5rem;
}

/* Other job titles at the same company, same as body text size */
h5 {
  color: #555;
  font-size: 0.8rem;
  margin-top: 0;
  margin-bottom: 0;
}
With the styles in place, you can build your PDF.
Building the PDF Output
You have your Markdown document and your stylesheet, and you have the tools to generate a PDF.
Create your PDF file with the following command:
pandoc resume.md -o resume.pdf --pdf-engine=weasyprint --css rsume.cssFor longer-term usage, since the command is more complex, turn it into a script.
Create the file build.sh with the following contents:
#!/usr/bin/env bash

input_file="resume.md"
output_file="resume.pdf"
css_file="resume.css"

echo pandoc "${input_file}" -o "${output_file}" --pdf-engine=weasyprint --css "${css_file}"
Make the file executable:
chmod +x build.shYou can now build your resume with the /build.sh command.
./build.shOpen resume.pdf in your PDF viewer and you’ll see a styled PDF document:
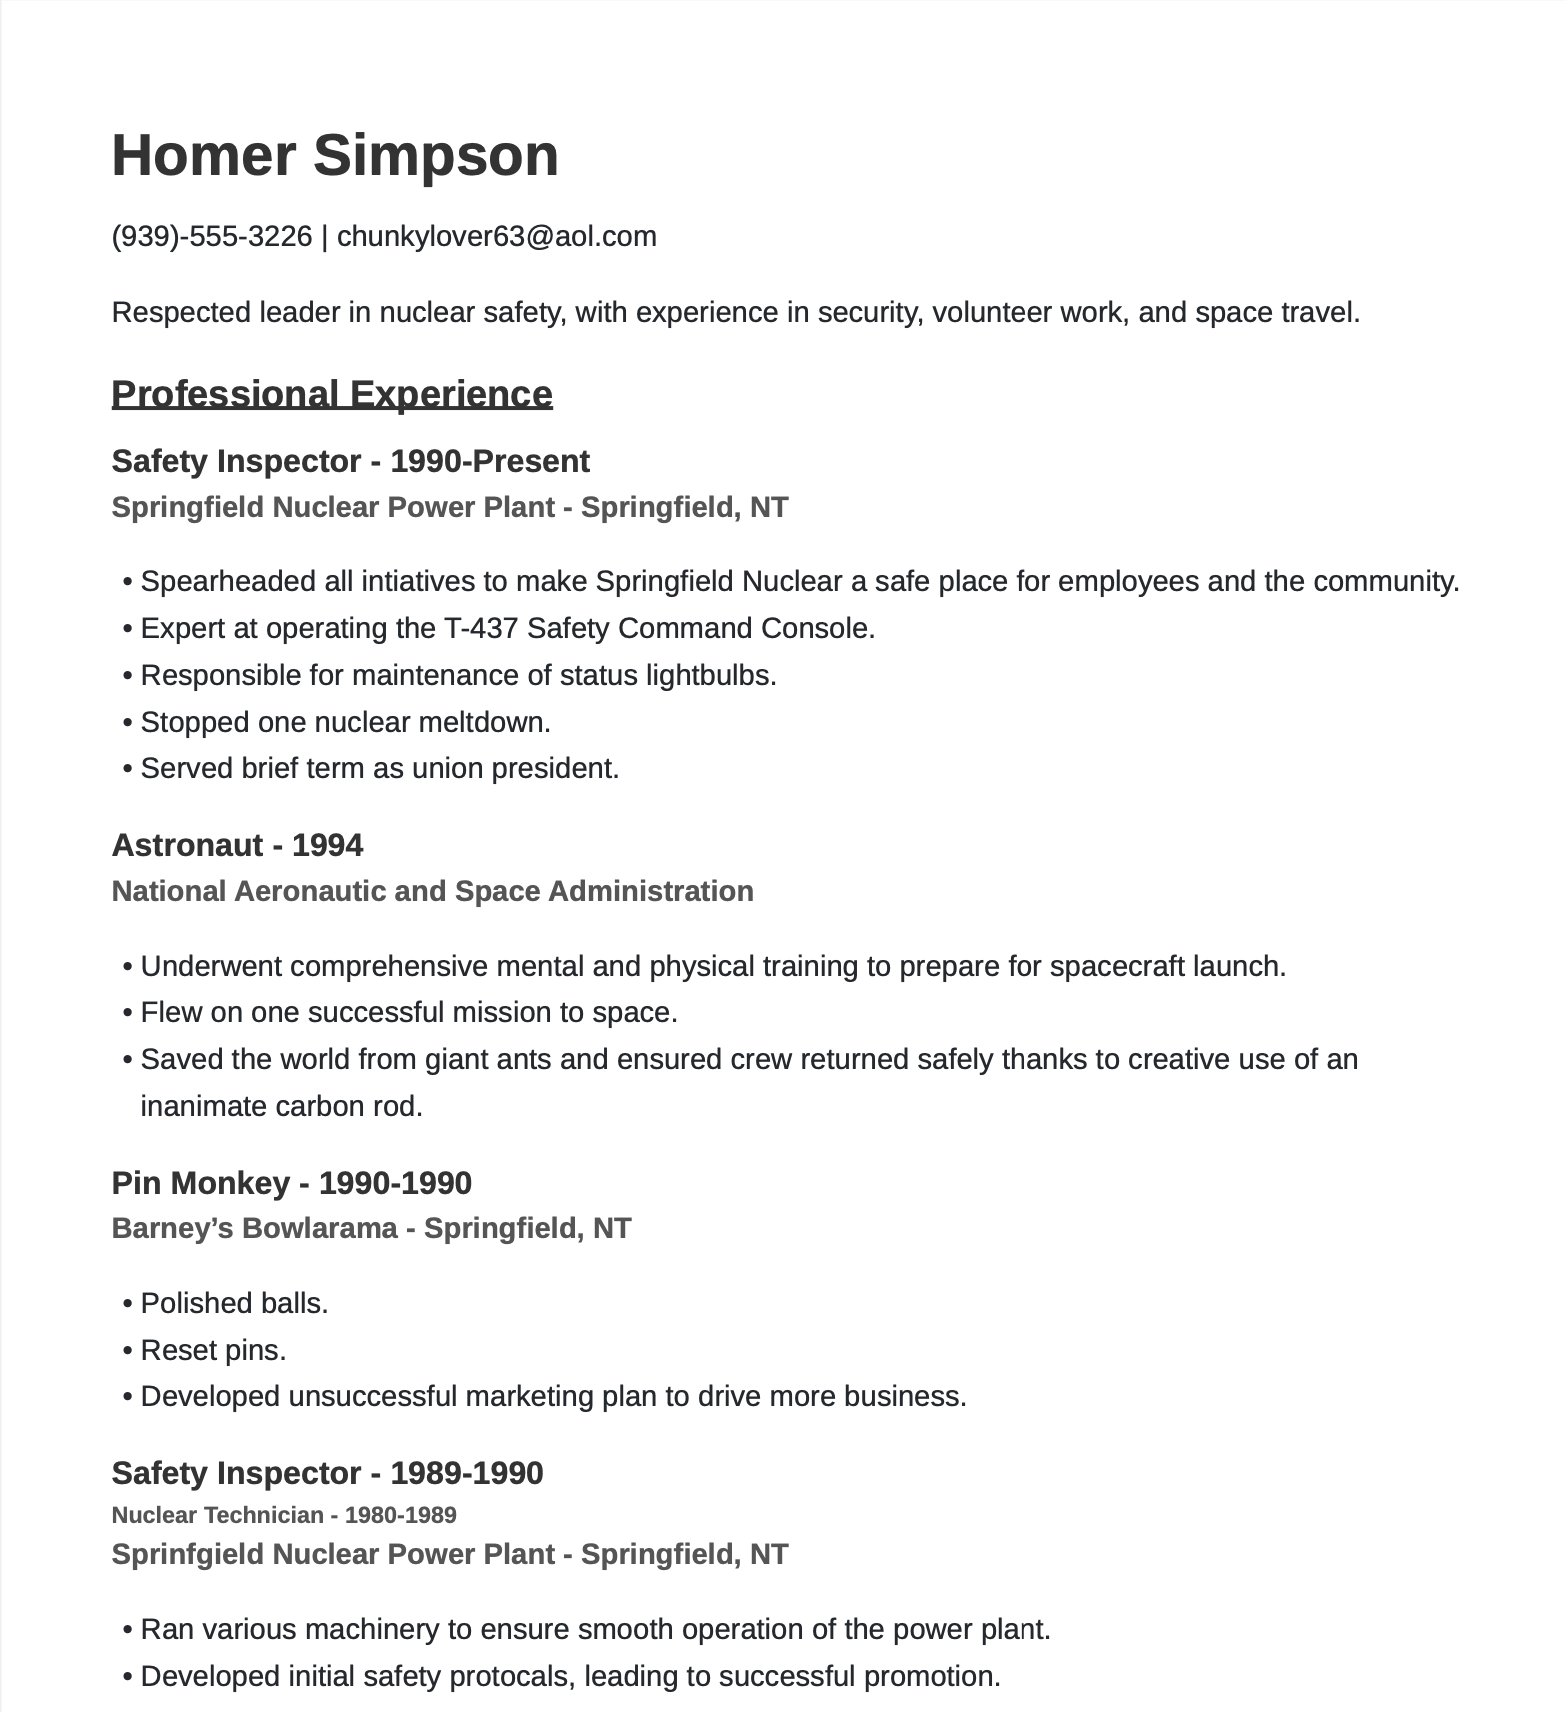
Your resume PDF looks good, but now that you have a working pipeline, you can tweak your resume’s appearance.
Making a Better Heading
The resume you’ve built has a linear flow. Markdown doesn’t have a good way to let you define additional structure, but you can get around this limitation by using HTML within your Markdown document.
Alter the resume so that instead of a regular Markdown heading and paragraph for the name and contact info, you have a <div> that holds the information:
<div class="heading">
  <h1>Homer Simpson</h1>
  <p class="info">(939)-555-3226 | chunkylover63@aol.com</p>
</div>
Now that the heading and paragraph are grouped within the div element, you can use CSS to position the elements.
Add the following styles to resume.css to style this heading section so that the name is on the left and the contact information is on the right:
.heading {
  display: flex;
  justify-content: space-between; /* Distributes space between items */
  align-items: baseline; /* Align items to their text baselines */
  border-bottom: 1px solid #333;
  margin-bottom: 1rem;
}

.heading .info {
  margin: 0; /* Removes default margin */
  text-align: right; /* Aligns the text to the right */
  font-size: 1rem; /* Adjusts the size of the contact information */
}
The key to making this two-column layout work is display: flex and its associated alignment properties.
Rebuild your resume and you’ll have a two-column heading:
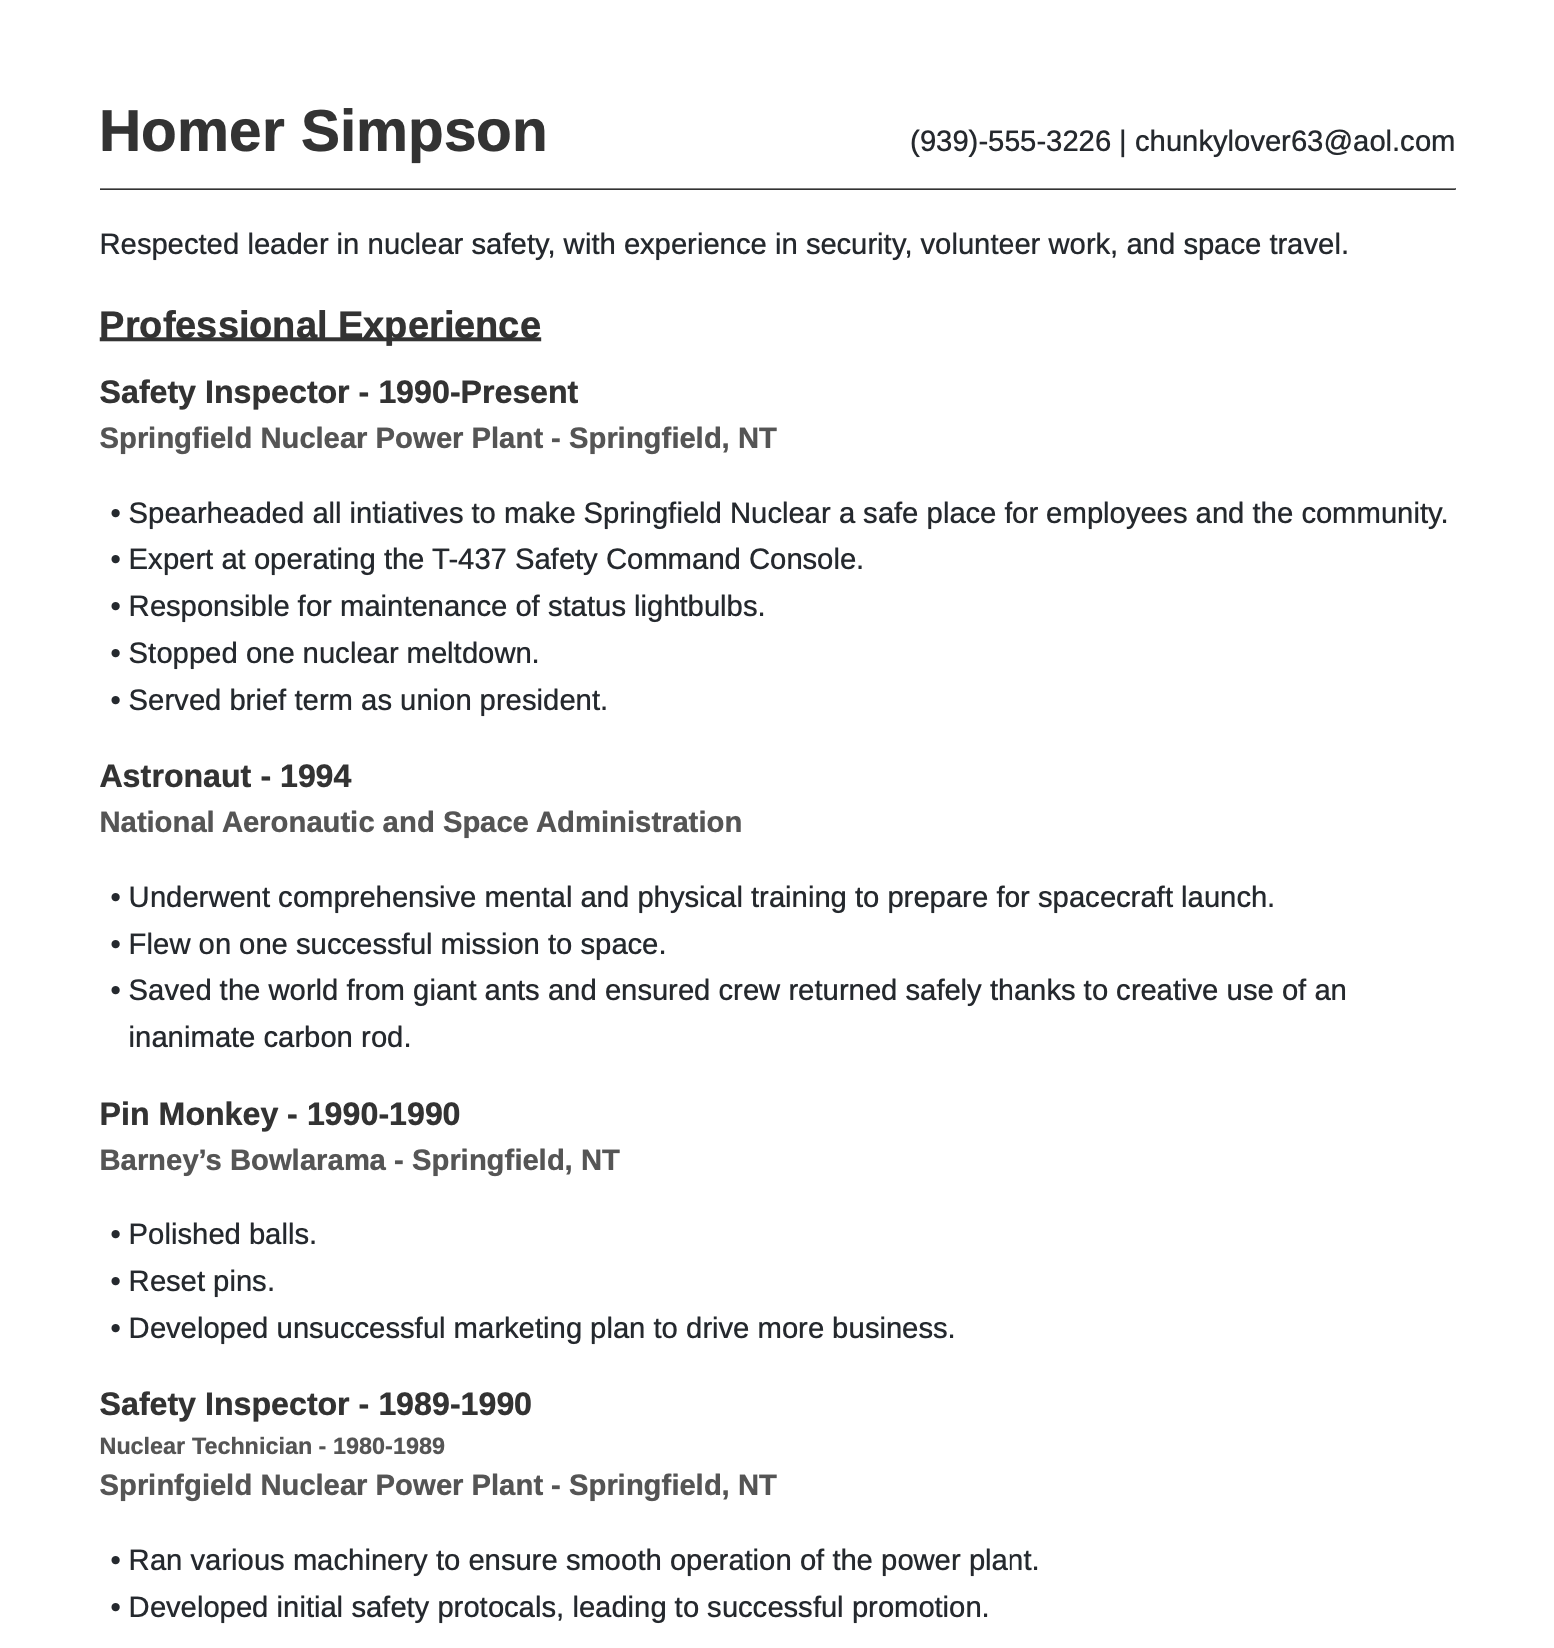
You can continue making other adjustments in the same manner. You can intermingle HTML and Markdown as much as you need to get the desired output you’re looking for.
Conclusion
By creating a resume specification, implementing it with Markdown, and defining a small print-friendly stylesheet, you can build your resume as a PDF file quickly. You can then reuse this content elsewhere, like in a Markdown-powered static site generator, or by converting it to another format with Pandoc.